NetApp DataSense on AWS
Over the last years, demands and expectations on data security have increased dramatically. The main drivers are local data privacy regulations like the EU-GDPR, which imply awareness of sensitive data and an overview of potential risks.
Amazon has offered its service Macie in 2017, added new capabilities lately, and is doing a great job with data on S3. But how do you include your EFS/FSx file shares and RDS databases to eliminate blind spots? Meet NetApp Cloud DataSense.
NetApp Cloud DataSense
NetApp Cloud DataSense offers a SaaS dashboard on data compliance (for various standards), governance, and inventory. It can be deployed either on AWS or even on-premises to scan and classify data, never sending back contents.
The service does not only supports S3 but also NFS and CIFS-based data shares like EFS and FSx. It also can scan OneDrive and, soon, Sharepoint Online and Exchange Online. This combination creates a central point for raising awareness of data risks, sensitive data, and finding entries for specific people (EU Right to be Forgotten).
And the price? Apart from the needed EC2 instances, it is free for 1TB of data and continues at moderate pricing after this.
So let’s see how to deploy this.
Step 1: NetApp Cloud Manager
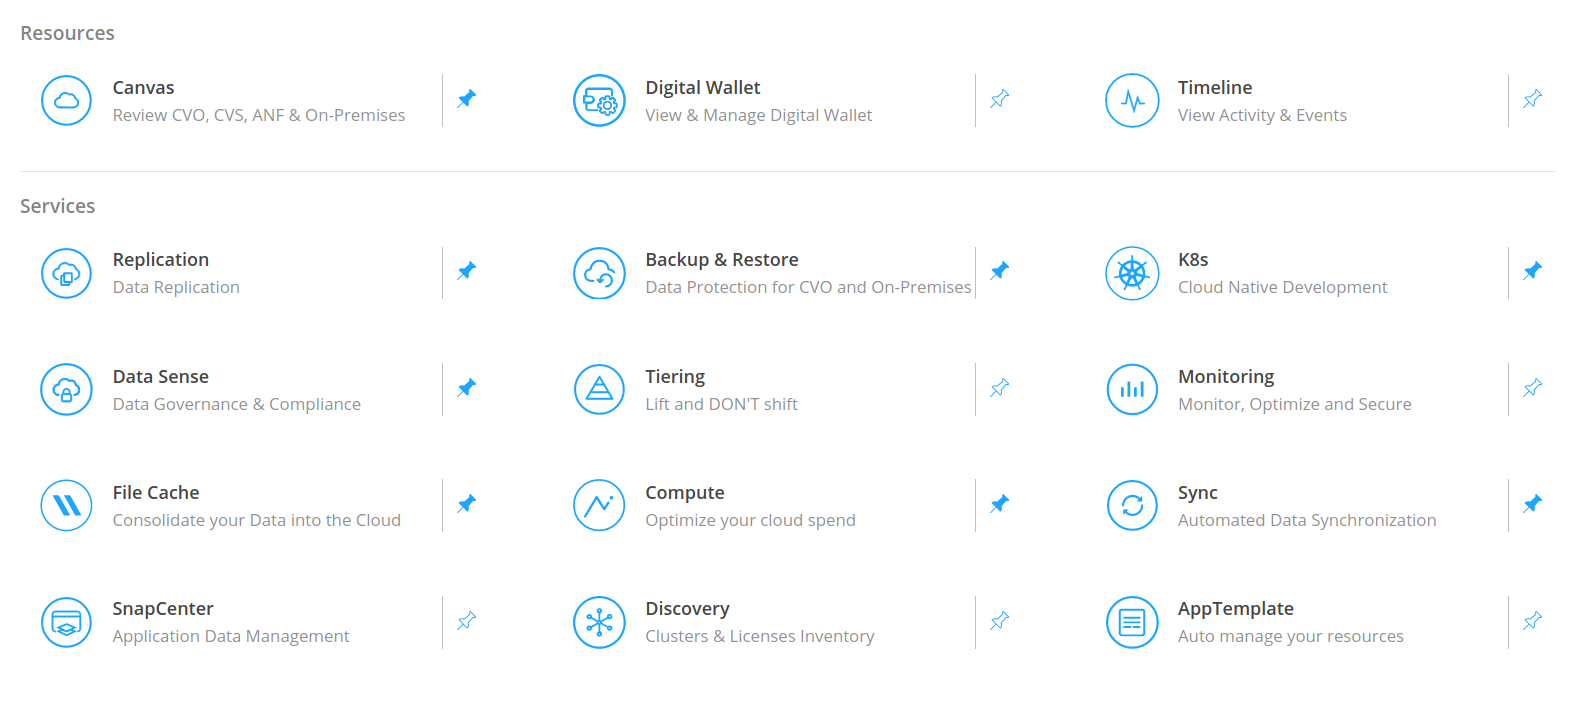
As a SaaS solution, you will first have to sign up for an account at NetApp Cloud Central - without any associated cost. The Cloud Manager interface offers access to DataSense and all the different NetApp services, including data replication and backup solutions.
Step 2: Connector Setup
Next, you have to deploy a connector instance that bridges the gap between your AWS Account/VPC and the NetApp SaaS service. With a working connector, you can deploy services from the Cloud Manager SaaS interface - such as DataSense.
There are two distinct deployment models:
AWS Marketplace:
You create an Instance Profile with the needed privileges and launch the connector instance via Marketplace. This way of deployment has the advantage of not hardcoding access keys but using the automatically rotated credentials instead. It will also limit our access to DataSense later, requiring VPN connections to your VPC.
Cloud Manager:
By creating an IAM user with a matching policy and their access keys added to the Cloud Manager SaaS interface, all deployments can happen automatically. Also, you will have direct access to DataSense in the SaaS portal.
As always, please review the linked policies, check if they are the most recent version and if you agree to their (broad) privileges.
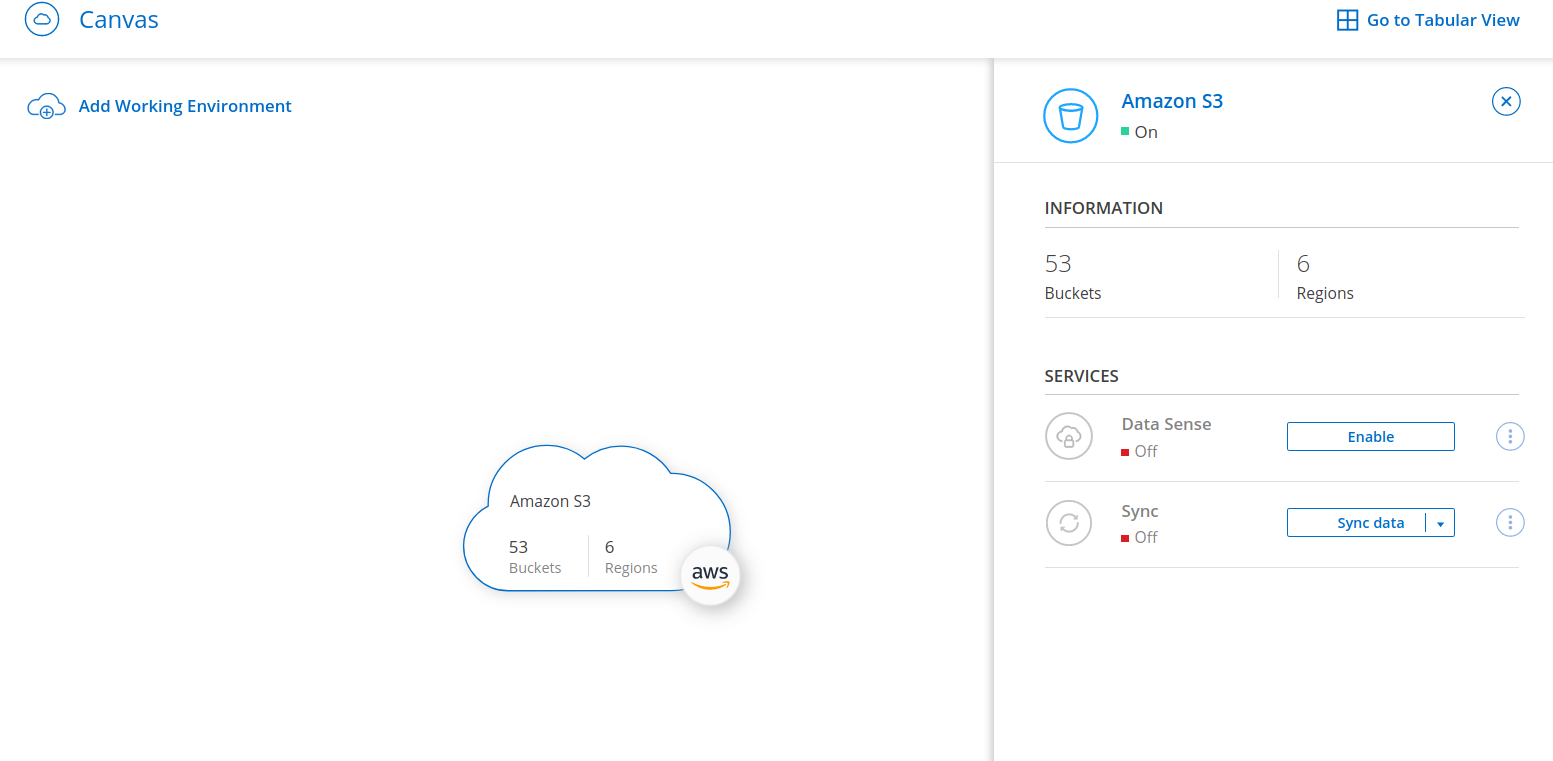
Instance sizes start at t3.xlarge, which makes running the Connector reasonably cheap. As soon as the Connector is ready, you will automatically see your S3 buckets pop up in the Canvas.
You could also add your Cloud Volumes Service for AWS, FSx for ONTAP, ONTAP Select or even on-premises storage systems/shares for data replication and backup. But that’s beyond the scope of this document.
Cloud DataSense Deployment
Now that we have our AWS account integrated with the NetApp solutions, we can deploy additional products such as DataSense.
We need to create an EC2 instance role first, which will be extended by policies granting access to the individual AWS services. If you want to scan S3 buckets, you will need a variation of the provided S3 Policy.
To bypass your NAT Gateways, the clear recommendation is to create an S3 Endpoint for your VPC.
Deploying via NetApp CloudManager is now a wizard-led task initiated from the NetApp Canvas under the “Data Sense” menu.
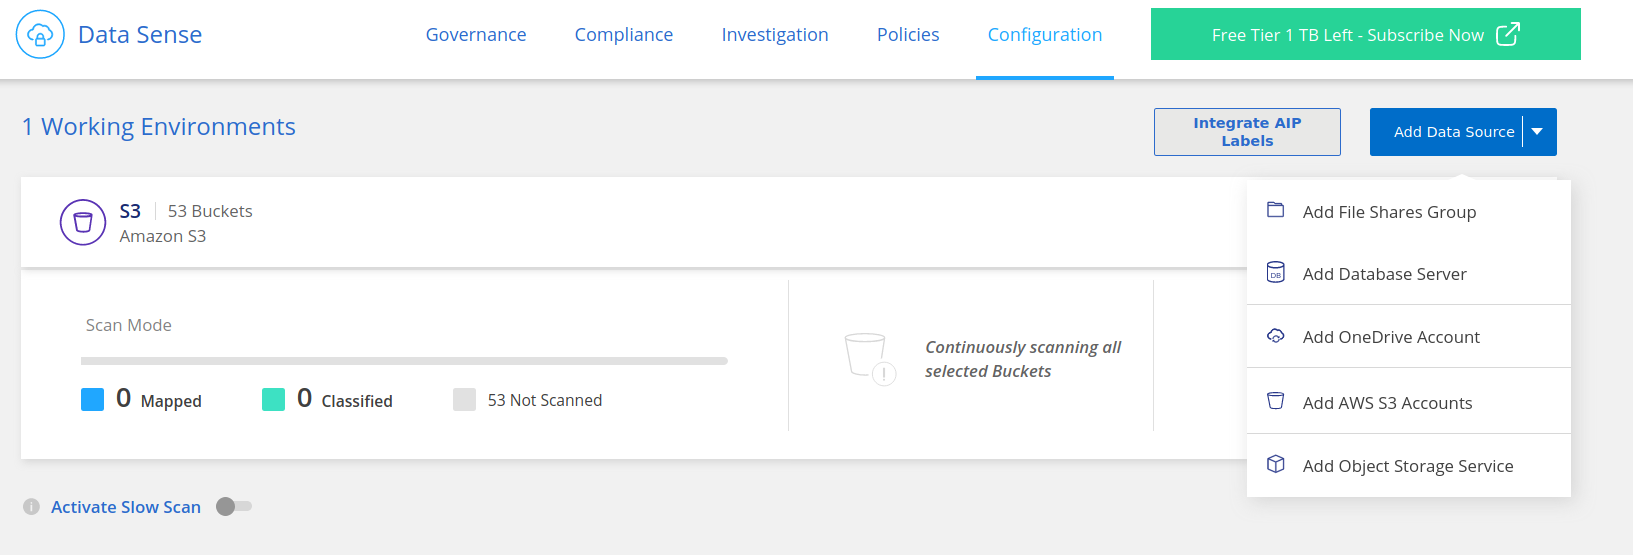
To enable the functionality of DataSense, you finally need to target it to your discovered S3 buckets and classify them into “Map” (only work with document metadata) or “Map + Classify” (inspect actual contents, e.g., for PHI/PII detection).
Any additional data sources can be added in guided steps via the various wizards under “Data Sense / Configuration”.
Instance Size
By default, the DataSense instance runs on an m5.2xlarge which is the recommended size. But for smaller environments, eight vCPUs and 16 GB memory are enough and supported. In these cases, c5a.2xlarge or t3a.2xlarge instance types might be sufficient and save 60% of the cost. 1
Working with Data
In the next post related to NetApp Cloud DataSense, I will go into the various ways of scanning and inspecting your data across different storage providers.